Showing posts with label sewing. Show all posts

Sunday, May 8, 2011

Photos of the projects going on...

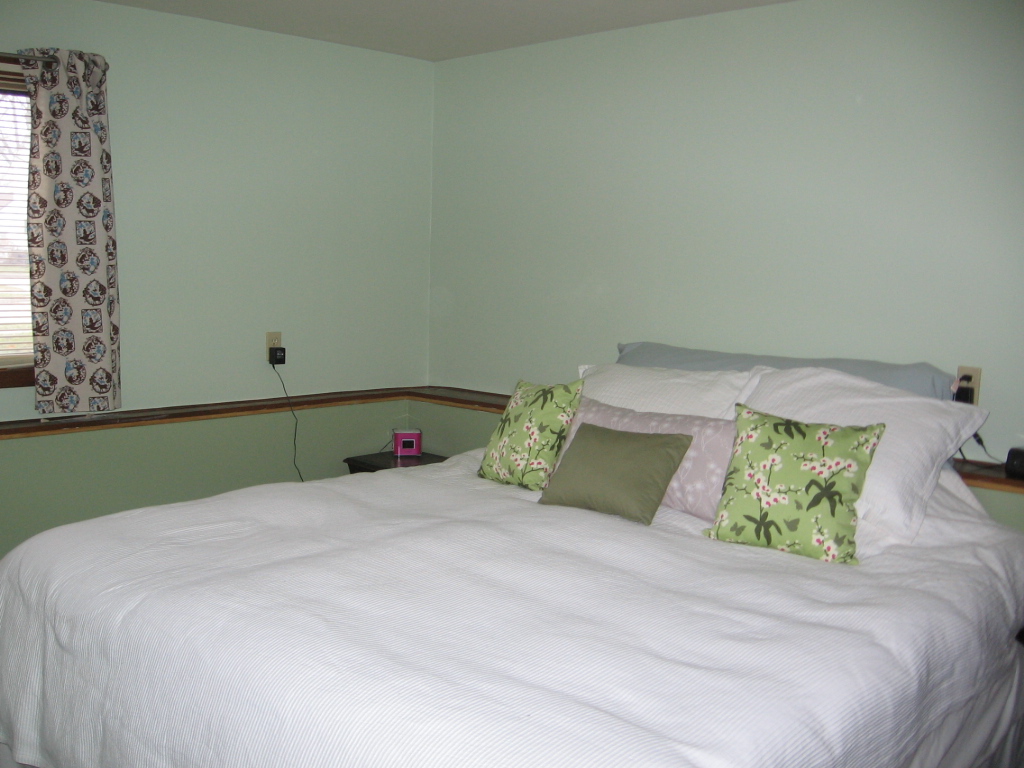
Bedroom/Nursery before getting a new color on the walls....

My mom's hard work! We're SO pleased with how it turned out.

With the curtains hanging...

And with (some) of the furniture...

Still need to put the cradle and changing table in there. But the cradle is still in Iowa with my parents or grandmother, and Mr. S hasn't had the chance to work on the changing table yet. We still have a few months.

Gearing up for another set of curtains. Note my new workspace! Mr. S made us a fabulous desk out of an old door.

To add some color to the walls, as well as help me better organize my thread stash.

The new workspace in all its glory. Isn't my husband amazing?

The newest set of curtains was for this space. You're looking at the before - an awkward three panel set up that was driving me CRAZY! We weren't maximizing our natural light because that middle panel refused to move anywhere out of the way. Refused, I tell you! And then it would get stuck on the rod. Bah! It had to go.

To be replaced by something brighter, more cheerful, and more easily mobile. Just two panels here that slide like grease along the rod, and actually move completely to either side so we can maximize our daylight. Love!!
Happy Mother's Day to all the mothers out there! We've been busy over here and have more projects coming up we'll be able to share. :)

~Ms. S

Monday, March 28, 2011

There's a baby on the way!

And that, my friends, is why I have been absent for...3 months? Has it really been that long?! Well, let's just say my energy was completely zapped by the bean-sized embryo taking charge of my belly. All for a good cause, of course. However, this means a host of fun projects to share! Including the most recently completed project - curtains for the nursery! (Did I mention we moved since the last time I think I posted?) We have a nursery, and the curtains were the first step.


I'm pretty proud of myself, because I didn't use a pattern and am happy with the result. And they were easy, to boot! Not to say I wouldn't change some things next time around, but overall, they're exactly what the room needed - a bit of what I'll call 'inspired cuteness.' I found an adorable print by Kokka at Crafty Planet with different fairy tales on it - Little Red Riding Hood, Cinderella, Thumbelina, The Musicans of Bremmen, and Puss in Boots. We're not finding out the sex of the baby beforehand, so it was important to find something that would work for either. This print fit what we were looking for.


Materials needed:
Fabric (I used 3 yards)
Coordinating thread
Grommets (mine came from Joanne's)
Scissors
Iron
Measuring tool for seams

The windows in this room already had curtains, so I measured the curtains that were already there to determine how much fabric I needed. And by measured, I mean I took the 1/8 of a yard sample and counted how many of those I would need to get my yardage. There are easier ways. Like a yard stick. Which I don't have.

Moving on! I washed and dried my fabric to pre-shrink it. How many times do you wash your curtains? Yeah, that's what I'm thinking, too, but when I DO want to wash curtains I certainly don't want my seams to pucker due to shrinkage.

Then ironing! Secretly, I find ironing to be quite relaxing. We actually couldn't find our iron for the longest time after moving here, but it turned up in the one box we hadn't actually opened up. Imagine that. I pressed the wrong side of the fabric (the side really doesn't matter) using high heat with steam since the fabric is cotton. The steam really helps ease those creases out of the material.

Once the fabric was pressed, I folded it in half and cut down the middle to get my two curtains. The pattern I used was printed differently than most are, so if you decide to do this yourself, you should make sure when measuring for your fabric that you're measuring the way you want the pattern to appear (hopefully that makes sense). Then I spread my material out on my table and placed the curtain I was using as a pattern over top to determine how large my seams could be.

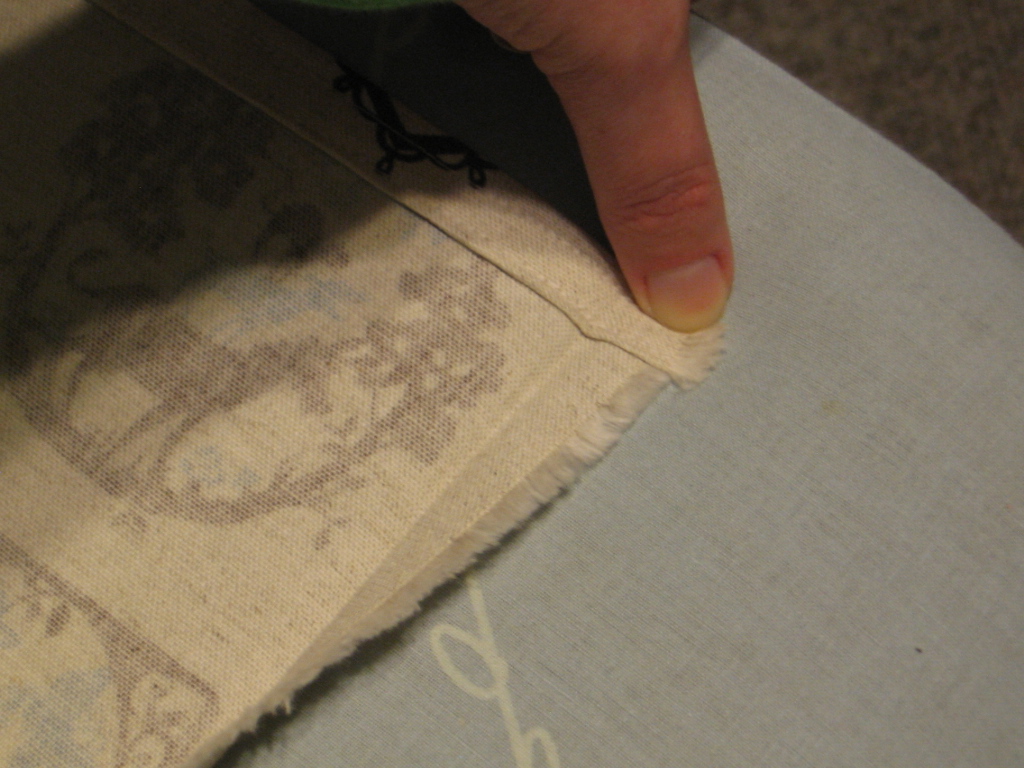
Next I measured and ironed my seams. On the bottom and top, I folded the fabric up 1/4 inch and ironed in place, and folded over again - this time 1/2 inch. Once the seams were marked, I went to the sewing machine and sewed a 1/4 inch seam...afterward realizing another go-round would ensure my seams were secure and laid flat. So I sewed another seam - approximately 5/8 this time (you'll see in the picture).


Repeat process for side seams. Although for the sides, I folded up 1/2 inch, ironed, and folded up another 1/2 inch. Sewed the double seams...but this time there were corners to contend with. How to make corners look decent? My method is one I made up, so if you're an experienced sewer, use whatever works for you. If you're looking for tips, here's what I did:
1. Fold up and press your first 1/2 inch; open


2. Fold in one corner until it meets the crease you just created; press

3. Keeping corner tucked in, fold up and press the second 1/2 inch

Voila! Sew your double seams. In addition to sewing the length of the fabric, I sewed the corners shut, too. Maybe that was overkill, but I didn't want those corners moving.

Then for the finishing touches. I pressed the curtains again, this time on the right side of the fabric, and placed one on my table to prep for grommets. I got these grommets at Joanne's and they were super easy to use. Four for each curtain. I placed the ones on the ends first and worked my way in following the instructions on the back of the package. Cut out my circles, placed my grommets in the circles and snapped them into place. All done! Word of the wise: place your end grommets within an inch and a half of the edges. My table wasn't big enough to not have some fabric hanging over the sides of the work area - so even though I placed them an inch and a half in, there were 2.5 more inches hanging off both sides of the table. Oops! Not a huge deal, and I could bring in the side seams (particularly the ones in the middle) a little more. For now, they're fine.


The rod that's in the nursery right now is one that wraps around at the corners. It works, but I'd like to get a straight rod that matches the grommets as I think the curtains would hang just a little bit more nicely. I'm pretty happy with the end result though! Easy curtains for the home.

Sunday, November 14, 2010

Change is in the air

I have intentionally left this place for a while in order to give some serious thought to what I want this space to be and how I want it to function. After reading a guest post on a friend's blog a while back about starting a blog, I decided it would be beneficial to:
1. Think about my subject and decide whether or not that was the direction I wanted to go
2. Think about my audience
3. Revisit how often I post
4. Start my new job and evaluate how much energy I would have at the end of the day to create posts

There are some changes in the air for this little space of mine. In thinking about my subject matter, it occurred to me that I still really dislike cleaning, and that this blog hasn't really inspired me back into the neat-freak I happened to be when I met my husband. What has happened since starting this blog is a growth in my craft projects. And I enjoy sharing them here because I'm proud of the work I do, and like sharing pretty things with you. But...I don't want to simply focus on my projects because that's not me, and because I'm also proud of some of the home fix-it, cleaning, and organizing tasks I accomplish. I'll get to what this means for the blog in a minute - after addressing numbers 2-4 above.

Thinking about my audience was the hardest part for me. Who reads my blog now? Who do I want to read my blog? How do I get those people to follow my blog? Those are big questions to answer, and my (albeit short) experience working at a branding firm reiterates the importance of answering those questions. As far as I know, friends and family are the only people who read this regularly, but I don't actually know that since visitors rarely comment (I don't hold that against anyone, by the way, though comments always make my day). And I could say that I want people who enjoy Martha Stewart, Design*Sponge, Amy Butler, Hygge & West, etc to find my blog. But I started this blog for myself, and if this place isn't about me first and what I feel compelled to share, I will quickly lose motivation to update it. So...I blog for me. Is that a bad thing?

Three and four kind of go hand-in-hand. I have traditionally been posting when motivated and when I had the energy. My new job doesn't leave me nearly as exhausted at the end of the day as was the case last year. So having the energy to whip out a post is quite likely and completely reasonable. I will be starting classes this spring, but I don't anticipate that being so overwhelming I can't maintain this space.

So what does this mean? It means I will be sharing home organizing/cleaning/and fix-it stories and tips as I see fit - reviewing things I try, sharing my (often creative) steps to fixing certain items, and sharing solutions to issues I find helpful and useful. In trying to get away from the monotony of telling you about how many dishes I had to wash, or how, yet again, I failed to stick to my 'chores' schedule, or how the bathroom really needs to be cleaned, I've decided it would be a welcome break for me to be able to focus more on sharing my sewing and craft projects. With the Holidays coming up, you can expect to see more crafty things here. :) I still plan on only promising one post/week. Mostly because weekends are when I have the most time to work on my projects. But that's not to say I'll hold back if I have more to share.

Hopefully these changes will be just what's needed for a fresh start here. With snow on the ground here, I'm off to finish and begin some Christmas projects...and dig out our Christmas music (inspiration never hurts, you know)! Enjoy your Sunday.

~ Ms. S

Wednesday, June 16, 2010

Please let it not be as hard as it looks

So I may have gotten myself into quite a mess while perusing my favorite fabric/craft store. You see, I got myself this Amy Butler mini dress, tunic, & tops pattern (plus fabric to make three of them). They will be amazingly cute once put together and I'm excited about that. But, once I got home I read the pattern. Yeesh! I think my mom may be getting a lot of phone calls to get me through this one. And you'll be reading updates of all my mishaps. You're welcome.

~Ms. S

Tuesday, June 8, 2010

WHAT?!

O.M.G. people. OMG. I did not realize it had been over a month since my last post!!! My most sincere apologies and gratitude to those of you who still check periodically. Life has been crazy busy what with school winding down, buckling down seriously with job searching, and taking a couple weekend trips. I really haven't done much interesting by way of cleaning or organizing because I haven't had the time or energy to do it. Which is kind of unfortunate because our house could use it at the moment - especially our dining room table. It has been sorely abused and neglected for the past several weeks. Never fear, table of ours, Monday is my last full day (bonus: no kids that day) and after that I have some projects lined up.

Here are some things to look forward to in coming weeks:
  1. Deeper clean than usual (likely to include tips, reviews of tips read in magazines, and things gone horribly but hysterically wrong)
  2. Finally pulling together a cleaning/organizing calendar
  3. Baking projects, as it's been far too long since I've done this thing I love so much
  4. Sewing!!!! Can't share all of them, as some will be gifts, but will be sure to document the processes, as I tend to do things more creatively than necessary
I probably need to channel the energy of one of my students who last week, upon being told that she would be a kindergartener when she came back to school after summer break, leaped to her feet, threw her hands in the air, and exclaimed, "I'm SO ready for kindergarten!! I can do anything!!!!" Maybe with that can-do attitude rooms in our house will look like the ones in the magazines. Maybe. Though I'm starting to believe the only people whose rooms actually look like that are 1) people with waaaaay too much time on their hands, or 2) people with waaaay too much money to pay lots of other people to make their rooms look (and stay) that way. Or maybe both.  

What do you think?

~Ms. S

Monday, March 29, 2010

More Pillows!

Today, I made some more throw pillows. Three to be exact - two 16x16 in, and one 12x16 in. When I got up this morning, I threw the fabric in the wash while I made my patterns for the pillows. Though they still took me longer than expected, I did not run into the same issues as last time; and my zippers went much more smoothly.

The great thing about doing a project like this is that you learn something new every time. Here's what I learned this time around: 
  • Patterns help tremendously with having two pieces of fabric that are the same size. In the future, however, I'd love to get one of those huge cutting boards so that for something as easy as squares or rectangles, simply placing the fabric on top of it doubled over would be a breeze.
  • Referencing your user manual solves problems that don't need to be problems. I know, I know - imagine that. But the issue I had with my needle not automatically adjusting to the zipper foot after I had to replace my first needle, was a user issue rather than a machine issue. 
  • This pattern requires you to move the zipper pull back behind the needle once you near the end both times. It's not easy moving that zipper pull either time, so I messed around with a few things today to see if I could find an easier way to get it all the way past the foot. *Crayola skinny markers work great! Here's what you do: while your foot is lifted, but your needle is still in, open your zipper a bit and leave the pull sticking out toward you. Using the capped side of the marker, push the cap against the zipper's pull and voila! No need to kill your fingers.
You'll find the final results below. My apologies that it's a little dark - it isn't quite summer with endless light yet. I'll leave you with a question. I'm not hugely fond of the plain green pillow - it needs a little something more. Any suggestions/ideas/inspiration?

Goodnight.
~Ms. S

Saturday, March 27, 2010

Throw Pillow Cover


The missing power cord for my sewing machine was found yesterday afternoon! You'll never guess where it was. Are you ready for this? It was on the bottom shelf of the microwave cart collecting dust - a logical place for it, no?! Thank goodness it turned up because I desperately wanted to get going on this throw pillow found on Design*Sponge via guest blogger Brett Bara.

In this post, I mentioned how excited I was to give this a try, as there was no pattern and it looked SO easy. Ha! Upon getting up this morning and finishing breakfast, I began working on this thinking I'd be done in an hour - hour and a half tops. Well...2.5 hours later when Mr. S got home from a morning workshop, I was just making the bed to see how the whole ensemble looked. (It's fabulous, by the way). Not quite how I'd intended my morning to go, but thankfully today was flexible.

Close-up of the fabric

If I'm being completely honest, this was my first "major" sewing project. And seeing as how even experienced sewers dread projects with zippers, I'd say I fared relatively well, though not without a few mishaps.

  1. I didn't cut my pieces perfectly evenly, so that made keeping track of a 1/2 inch seam hard.
  2. Even following the directions as carefully as possible, I managed to bend my needle beyond saving when it hit the zipper pull. Oops. 
  3. After sewing the remaining three sides, the instructions tell you to turn your cover right side out and iron your seams flat. My zipper was zipped closed when I sewed my remaining three sides, so finagling the thing open far enough to reach my hand all the way in was comical.
Here's what I'd do differently next time:
  • Make a pattern - I have lots of tissue paper, so I'd use it to make sure my pieces match
  • Keep my zipper open upon finishing that step
  • Be more anal about measuring my seams
Other than that, I'm quite happy with the end result (though I'm hoping the zipper won't take me two hours next time), and Husband was quite impressed. Here's to the next set of pillows; we'll be shopping for fabric this afternoon! :)

Happy Spring!

~Ms. S